Creating an AdHoc Action in AuditApp (Mobile)
Did you know you can create an AdHoc Action directly from the AuditApp mobile application? AdHoc Actions allow you to assign tasks, initiatives, training, or informational items to one or more locations at any time — without needing to be tied to an audit. This article walks you through the steps to create an AdHoc Action from your mobile device.
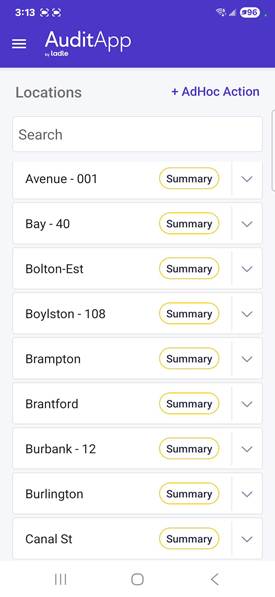
Step 1: Access the Locations Screen
Open the AuditApp on your mobile device. You will land on the Locations screen, which displays all of your available locations. In the top-right corner, tap the + AdHoc Action button to begin creating a new action.
Step 2: Select the Action Type
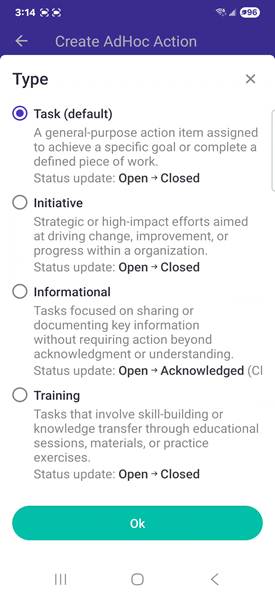
A Type selector will appear. Choose the type that best fits the action you want to create:
• Task (default) — A general-purpose action item to complete a defined piece of work. Status: Open → Closed.
• Initiative — Strategic or high-impact efforts aimed at driving change or improvement. Status: Open → Closed.
• Informational — Tasks focused on sharing or documenting key information. Status: Open → Acknowledged.
• Training — Tasks involving skill-building or knowledge transfer. Status: Open → Closed.
Once you have selected the desired type, tap Ok to confirm.
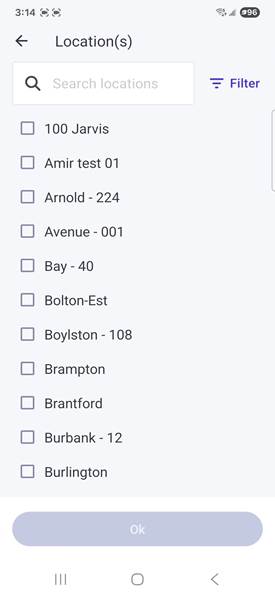
Step 3: Select Location(s)
Tap the Location(s) field to open the location picker. You can search for specific locations using the search bar, or use the Filter option to narrow your results. Select one or more locations by tapping the checkbox next to each location name, then tap Ok.
| Please note: The AdHoc Action will be created separately for each location you select. If you select 3 locations, 3 individual AdHoc Actions will be created. |
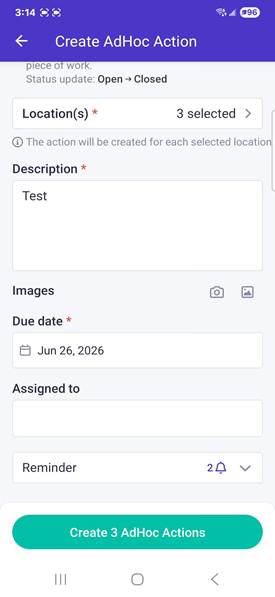
Step 4: Fill In the Action Details
With your Type and Location(s) selected, complete the remaining required fields on the Create AdHoc Action form:
• Description (required) — Enter a clear description of what needs to be done.
• Images (optional) — Attach a photo using your camera or from your gallery.
• Due date (required) — Set a deadline for the action to be completed.
• Assigned to (optional) — Assign the action to a specific user (e.g., GM for General Manager).
Step 5: Configure Reminders and Additional Options
Scroll down to configure optional reminder and closing settings:
• Reminder — Tap to expand and set up to multiple reminders relative to the due date (e.g., 1 day before, 1 day after). Tap Add Reminder + to add more.
• Closing action requires an image — Check this box to require the assignee to attach a photo when marking the action as complete.
• Read receipt — Check this box to receive confirmation when the assigned user has read the action.
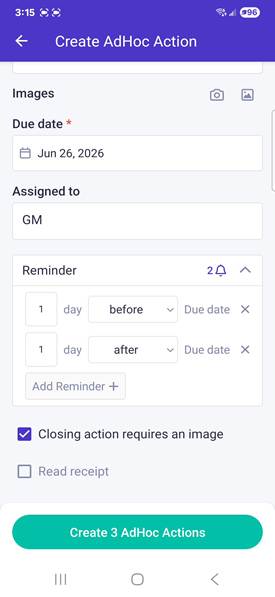
Step 6: Create the AdHoc Action(s)
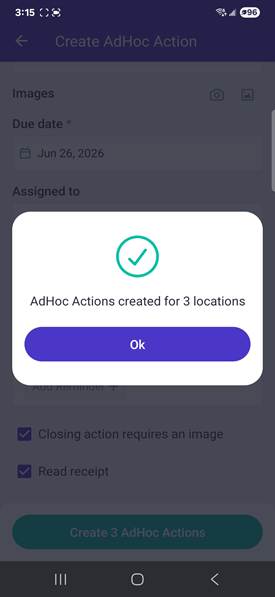
Once all required fields are filled in, tap the Create AdHoc Actions button at the bottom of the screen. The button will display the number of actions that will be created based on your location selection (e.g., Create 3 AdHoc Actions). A confirmation message will appear indicating the actions have been successfully created.
| Please note: If an assigned user is set, they will receive an email notification informing them of the newly created action. |